Craftee / Guide
How to print photocards at home.
A home inkjet, photo cardstock and a file at the right size will produce a card that passes for shop-bought at arm’s length. Three numbers decide the result — and only one of them lives in the printer settings.
Updated 8 November 2026
Before you print
Three numbers decide everything.
55 × 85mm
the card
650 × 1004px
at 300 DPI
100%
print scale
Size: 55 × 85 mm is the photocard standard, and what sleeves, toploaders and binder pages are cut for. Any other size and the card is the odd one out in the binder.
Resolution: 300 DPI at final size — 650 × 1004 pixels for a card this small. A phone photo clears it easily; a screenshot of a screenshot does not.
Scale: 100%. Every “fit to page” and “scale to fit” option shrinks the sheet to the printer’s margin — and the shrink lands on your cards. This is behind almost every “why are my cards too small” post.
Paper
The paper does more work than the printer.
Cards read as cards because of weight. Glossy inkjet photo cardstock in the 230–300 gsm range is the sweet spot: stiff enough to feel like an official card, still thin enough for a home printer to feed. Matte is softer and shows fingerprints less — pick it if you like that look, but expect colours to sit a little flatter.
| Paper weight | How it feels | |
|---|---|---|
| 120–160 gsm | Cards bend and crease in a sleeve | Proof prints, testing layout |
| 200–220 gsm | Firm, still flexible | Casual cards, sticker backs |
| 230–300 gsm | Close to an official card | Photocards, trading cards |
| 320 gsm and up | Stiff, shop-like | Only if your printer feeds it |
Glossy paper and wet ink do not like being handled immediately: give a print a minute to dry before trimming, and keep plain paper between cards while you work through the stack.
Printer settings
Four settings, in this order.
1. Paper type. Set it to the paper you actually loaded — “photo paper”, “glossy photo”, or the closest match. It changes how much ink the printer lays down, and the wrong setting is why prints look washed out or smeared.
2. Quality. Best or highest. A card is small enough that the extra ink costs pennies, and the difference at 55 mm wide is visible.
3. Scale. 100% or “Actual size”. Then check the first sheet with a ruler: the frame should measure 55 × 85 mm before you print ten more.
4. Borders. Leave borders on. Most home printers cannot print into the last few millimetres, and cropping to borderless is what cuts into the card edges. The sheet is laid out with margins for exactly this reason.
Layout
Nine on A4, six on Letter.
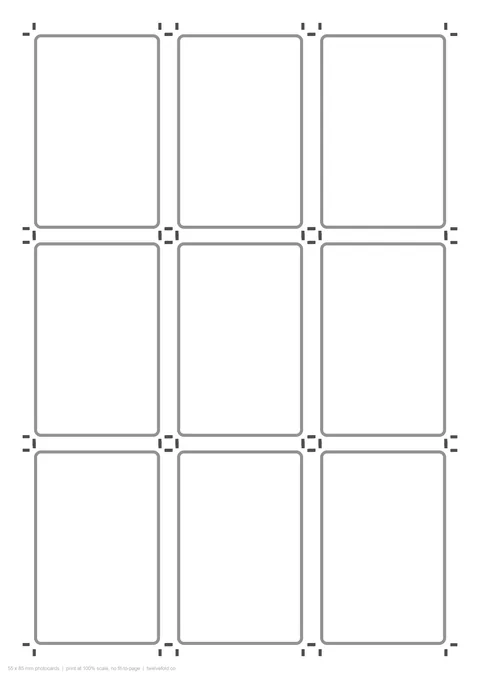
Printing one card per sheet wastes paper and time. A4 (210 × 297 mm) holds three rows of nine cards; US Letter (8.5 × 11 in) is 18 mm shorter, so it holds two rows of six. Both layouts need a few millimetres between cards, or the trim on one card eats into its neighbour.
The free Craftee photocard templates are exactly these two sheets, with crop marks at every corner of every card: A4, nine cards or US Letter, six cards. Design on top in any editor and print. If you would rather build the sheet yourself, the rule is simple: 55 × 85 mm frames, 3 mm between them, at least 10 mm of margin on every side.
Trimming
Cut on the marks, then round the corners.
A paper trimmer or a small guillotine gives straight edges that scissors never will. Cut on the crop marks — not along the printed frame — so the card ends up exactly 55 × 85 mm even if the printer shifted the sheet by a millimetre.
Then round the corners. This is the step that changes how a card reads: official photocards have soft corners, and a square-cornered card looks home-made no matter how good the print is. A 3 mm corner rounder handles the four corners in a few seconds. Stack, sleeve, done.
After the print
Sleeves, binders, and keeping them flat.
Sleeve a card as soon as it is trimmed — fingerprints on a fresh print are permanent. Standard photocard sleeves are cut a millimetre or two larger than the card, so a 55 × 85 mm card slides in without bending. Rigid toploaders are for trading and posting; most 9-pocket binder pages hold a sleeved card comfortably.
Store the binder upright and out of direct sun. Inkjet prints fade faster than offset printing, and a windowsill will show it within a season.
Or skip the printer
When a shop is the better call.
A print shop earns its money on volume and on paper you cannot feed at home. If you need thirty cards, ask for 300 gsm gloss, 300 DPI, trimmed to 55 × 85 mm — and bring the PDF from the template page, crop marks included. Most shops will print a full sheet and trim it for less than the cardstock would cost you.
What you cannot outsource is the design. That is the part Craftee does: the photocard preset at 55:85, one-tap on-device cutouts, and transparent PNG exports at up to 2048px.

FAQ
Questions, answered.
Can you print photocards at home?
Yes. A normal inkjet with photo paper, a 300 DPI file at 55 × 85 mm, and 100% scaling gets you a card that is indistinguishable from a shop print at arm’s length. The paper matters more than the printer: 230–300 gsm photo cardstock is what gives a card its stiffness and weight.
What paper should I use for photocards?
Glossy inkjet photo cardstock in the 230–300 gsm range. Below about 200 gsm the card feels like paper and bends in a sleeve; above 300 gsm most home printers start to struggle to feed it. Matte cardstock is softer and shows fingerprints less, if you prefer that look.
Why did my cards print out too small?
Almost always the print dialog. “Fit to page”, “scale to fit” and “shrink oversized pages” all resize the sheet to the printer’s margins, and that shrink lands on the cards. Set scaling to 100% or “Actual size”, and check the first page with a ruler before printing a full sheet.
What resolution do photocards need?
300 DPI at final size is the print standard: 55 × 85 mm works out to 650 × 1004 pixels. Craftee exports transparent PNGs up to 2048 px on the long edge, which is roughly 600 DPI at card size — more than enough headroom for a home printer.
Do I need a corner rounder?
No, but it is the single cheapest upgrade. Official photocards have softly rounded corners; a card trimmed square with scissors reads as printed at home even when everything else is right. A 3 mm corner rounder is the usual size, and it takes a second per corner.
Should I print on A4 or US Letter?
Whatever your printer takes. A4 fits nine 55 × 85 mm cards on one sheet (three rows), US Letter fits six (two rows) because it is 18 mm shorter. The free Craftee print sheets are laid out for both, with crop marks.
More from Twelvefold
Tools that pair well with this one.
 CrafteeRound corners & AI cutout for iPhone
 LatentPrivate AI image generator
 TalkaAI English speaking coach
 OverLensOn-device screen translator
 QRacadeAnimated QR code generator
 SoarlyticsPublic X (Twitter) stats
 NYC HustleRetro pixel trading game
 Da Siu YanHong Kong villain-hitting ritual
 WHEEFree browser mini games